Setting up a VFX shoot.
Set up a tripod
Start of by setting up a tripod make sure to ensure that the legs are secure to a height you want using bubble level a tool designed to indicate whether a surface is horizontal (level) or vertical (plumb) which can help level the cameras angle.


Then attach the camera to the tripod shoe which is something that secures the camera to be safely in place.


The next thing is a SD card but their are different classes such as class 4 and 10 and the only real difference between these class is the speed and higher quality for recording videos or taking photos. Class 10 is 10 MB/S and Class 4 MB/S.


Setting up the camera their are a few things scubas obviously the battery life so make sure their is enough for filming or recharge it otherwise if it runs out of battery while recording the footage could be lost and may have to start again. Make sure the camera is tightly gripped on the tripod shoe so it docent fall off by accidentally knocking it. Then insert the SD card to capture the footage and make sure the cameras on. Then set the camera to video mode and check the autofocus/manual focus setting on the lens to get the best quality. Set the camera to auto exposure/manual exposure (a standard feature on digital cameras that will automatically determine the correct exposure for pictures without any user input) on the camera body and lastly hit the record button.

A camera dolly is wheeled cart which is used in filmmaking and television production to create smooth horizontal camera movements. The camera is mounted to the dolly and the camera operator and focus puller or camera assistant usually ride on the dolly to push the dolly back and forth. The camera dolly is generally used to produce images which involve moving the camera toward or away from a subject while a take is bring recorded, a technique known as a dolly shot.
Lighting
Using different techniques in lighting can bring a different type of scene in movie using different techniques. Low key lighting is a lighting effect that uses a hard light source to enhance shadows in your scene. Unlike high-key lighting (in which shadows are minimized) low key lighting is all about shadows and contrast.


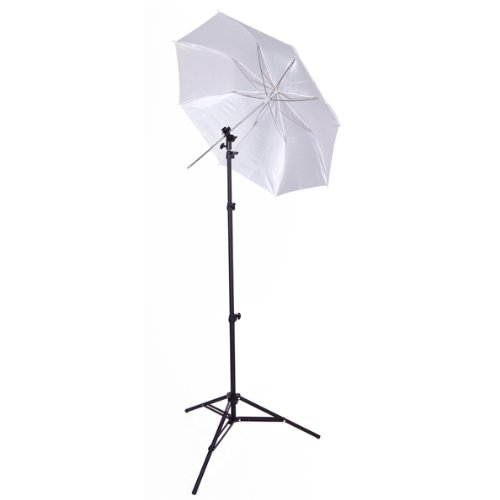
Studio flash is all about positioning the light source away from the camera, so stands are crucial. They support the flash heads, which means they can be positioned at the right distance and angle to the subject. Most kits have two flash heads. Along with a flash tube, there’s a modelling light. Most have a switchable ‘slave’, enabling one flash to be triggered by another, so you only need to have your camera connected to one of the heads. A brolly is the most standard form of lighting accessory. The flash is directed into the brolly so the light is reflected back onto the subject. They are available in different reflective surfaces – typically white, silver or gold. Soft boxes are slightly more sophisticated than brollies and once you’ve worked out how to assemble these tent-like devices, they create a softer and generally more flattering light, with a more even illumination. Snoot/honeycomb both of these tools help to concentrate or ‘focus’ the light. They’re ideally suited for use as backlights or for isolating a particular part of an image. A simple reflector can be really useful in a studio lighting setup, especially if you’re only using one light. You use it the same way you would with natural light – to bounce light back onto your subject and fill in any hard shadow areas.
Light stand

Flash head

Umbrella
Soft box Snoot


Honeycomb

Reflector Green screen Lighting

Set up you green screen so it is as smooth as possible, stretch it out if need be to get rid of wrinkles, or hang it up high so the weight of the cloth pulls out wrinkles. Create a soft even light over the green screen. Light the green screen a couple of stops below your subject. Blasting the green screen with loads of light isn’t a good idea, as you can bounce green light off the screen onto your subject. Treat your green screen and your subject separately. Once you are happy that you have an evenly lit green screen, light your subject in the same way you normally would. Avoid all shadows. The easiest way to do this is to create some distance between the green screen and the subject. Shoot at a wide aperture when possible. Use a backlight to sharpen the edges between the subject and the green screen. This should be a relatively soft light. Lastly, an obvious one, make sure no body is wearing green. This also applies to reflective material, a watch or piece of jewellery, glasses etc.

Sound equipment
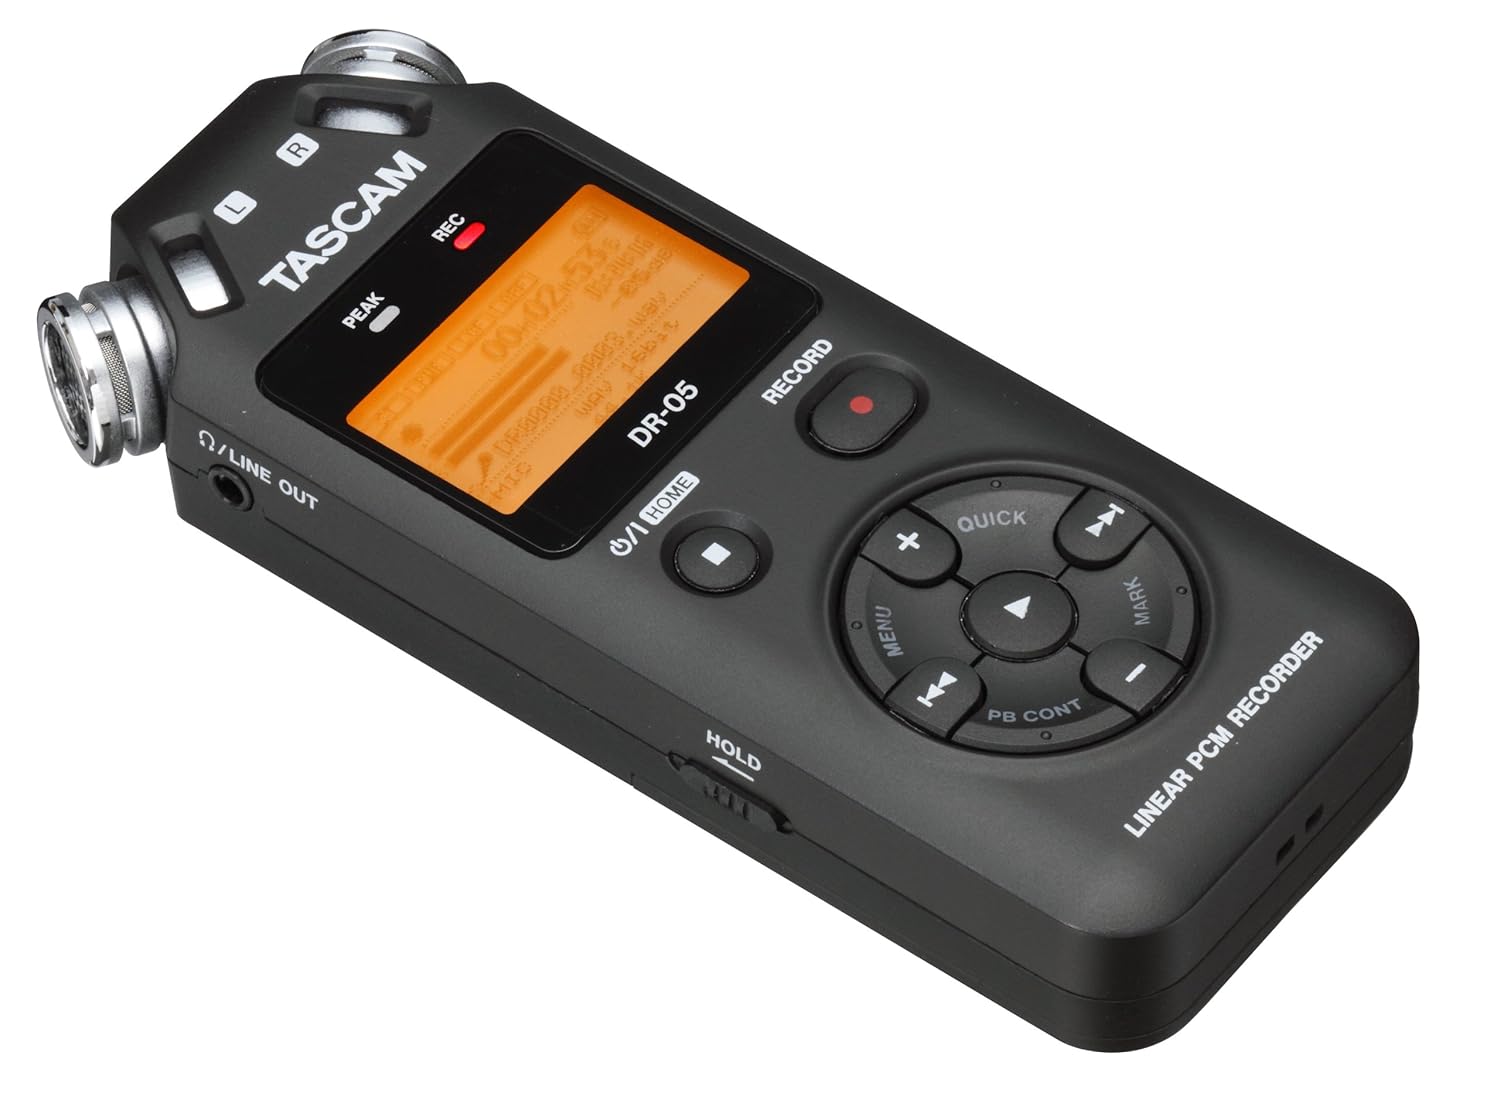
Tascam Sound Recorder
External sound recorder.
Sound from DSLR cameras
Sound recording is possible with the camera’s builtin monaural microphone or a commercially available external stereo microphone connected to the camera via its 3.5 mm diameter stereo mini plug jack. With either the built-in microphone or an external mic, the sampling rate is 44.1 KHz and the bit count is 16 bits for both Land R channels. Audio levels and wind filter settings are controlled automatically. Sound recording can be turned off or on in the camera’s Live View menu.
Sound quality on cameras on partically DSLR is low therefore using a external sound source such as a Tascam will allow for better sound quality.
During the editing of sound process from an external device editors would have to sync the sound and the footage together in Adobe Premiere.
